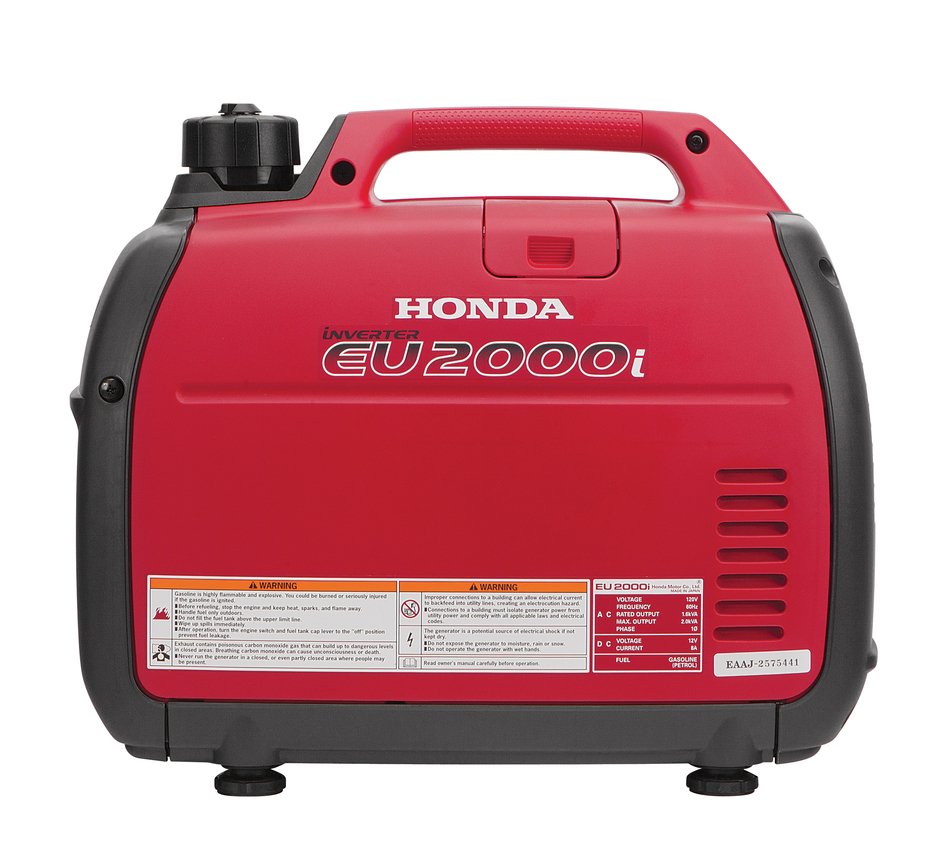
So you’ve invested in a Honda EU2000i, one of the most reliable and beloved inverter generators on the market. Smart move! These powerhouses are renowned for their quiet operation, fuel efficiency, and portability, making them ideal for everything from remote work sites to serene camping trips and essential home backup. But like any high-performance equipment, your EU2000i won't last forever on its good looks alone. Consistent, thoughtful Honda EU2000i Maintenance & Care isn't just a recommendation; it's the secret to unlocking years—even decades—of dependable power. Think of this guide as your owner's manual, reimagined for clarity and real-world application, helping you keep your generator purring like new.
At a Glance: Your EU2000i Maintenance Checklist
- Safety First: Always allow equipment to cool, power off, and disconnect spark plugs before any work.
- Routine Checks: Inspect oil and air filter before each use.
- Engine Oil Changes: First change at 20 hours, then every 6 months or 50-100 hours of use.
- Air Filter: Clean every 3 months or 50 hours; replace with an OEM filter if damaged.
- Spark Plug: Adjust every 6 months/100 hours; replace annually/200 hours.
- Spark Arrester: Clean every 6 months or 100 hours.
- Fuel Management: Use fresh, stabilized, non-ethanol fuel; drain for long-term storage.
- Seasonal Storage: Winterize your generator properly for extended periods of inactivity.
- OEM Parts: Always opt for Original Equipment Manufacturer parts for best fit and performance.
Why Your EU2000i Deserves Your Diligent Attention
Generators are marvels of engineering, designed to kick in when you need them most. But their performance relies heavily on how well you treat them. Neglecting your Honda EU2000i can lead to a cascade of costly problems: reduced power output, excessive fuel consumption, increased noise levels, difficult starting, and ultimately, a dramatically shortened lifespan. It’s not just about avoiding breakdowns; it’s about optimizing efficiency.
Regular maintenance, following Honda's meticulously crafted operator manual, ensures your generator runs at peak efficiency, sips fuel sparingly, operates longer between service intervals, and stays as quiet as the day you bought it. This proactive approach isn't just about protecting your initial investment; it's about ensuring unwavering reliability when the lights go out or when you're far from an electrical grid. Think of maintenance as preventive medicine for your power source.
Safety: Your Absolute Priority Before Touching Anything
Before you even think about cracking open your generator or performing any service, remember this cardinal rule: safety first. Generators involve fuel, electricity, and potentially hot moving parts—a combination that demands unwavering respect.
Here’s your essential safety checklist, every single time:
- Cool Down Completely: The engine, muffler, and other components become extremely hot during operation. Allow the equipment ample time (at least 30-60 minutes) to cool down to ambient temperature before attempting any maintenance. This prevents severe burns.
- Engine Off & Keys Out: Ensure the engine is completely shut off. If your model has an ignition switch or key, turn it off and remove the key. This prevents accidental startup.
- Disconnect the Spark Plug: This is a crucial, non-negotiable step to prevent accidental ignition. Pull the spark plug cap firmly off the spark plug. This isolates the ignition system, ensuring the engine cannot accidentally start while you're working on it, thereby preventing serious injury or unexpected movement.
- Work in a Safe Space: Always perform maintenance in a well-ventilated or outdoor area. Fuel fumes are dangerous and flammable. Use a solid, level surface to prevent fuel spills, accidental tipping, or balance issues while you work. Keep children and pets away from the work area.
- Eye Protection: Consider wearing safety glasses to protect your eyes from debris, especially when cleaning or using tools.
These precautions aren't just suggestions; they are critical, non-negotiable steps designed to protect you from harm and ensure a safe working environment.
Understanding Your Maintenance Schedule: Hours vs. Time
Honda’s maintenance schedule isn't a simple one-size-fits-all directive. It's intelligently based on your generator's actual hours of use or a specific time interval (e.g., every 6 months), whichever comes first. This nuanced approach acknowledges that components can degrade, seals can dry out, and fluids can break down over time, even if the generator isn't actively running.
For example, oil changes are recommended at certain hour intervals or every six months. This means even if you only use your generator for 10 hours a year, you still need to change the oil biannually. Always consult your specific EU2000i operator manual for the most precise schedule. It's the definitive guide for your model, detailing exact specifications and procedures.
The Core Maintenance Procedures: A Step-by-Step Guide
Let's dive into the practical steps for keeping your Honda EU2000i in pristine, ready-for-anything condition.
1. Engine Oil: The Lifeblood of Your Generator
Engine oil lubricates internal components, reduces friction, helps dissipate heat, and cleans by carrying away contaminants. Fresh, clean oil is paramount for engine longevity and smooth operation.
Why Oil Matters So Much
Over time, engine oil breaks down due to heat and contamination from combustion byproducts. Degraded oil loses its ability to lubricate effectively, leading to increased wear, overheating, and eventual engine failure.
Checking Oil Levels (Before Each Use)
- Make it a Habit: Before starting your generator, every single time, check the oil level. Running with low oil is one of the quickest ways to cause severe and irreversible engine damage.
- Procedure:
- Place the generator on a solid, level surface.
- Remove the maintenance cover (usually a side panel).
- Unscrew the oil filler cap/dipstick.
- Wipe the dipstick clean with a lint-free cloth.
- Reinsert the dipstick without screwing it in (just rest it on the threads).
- Remove the dipstick again and read the oil level. It should be between the upper and lower marks. If low, add recommended oil slowly until it reaches the upper mark.
- Reinstall the oil cap/dipstick and cover.
Changing the Engine Oil
- Initial Change: The first oil change is absolutely critical. It should be performed after the first 20 hours of use. This initial period is when the engine "breaks in," and tiny metallic particles from manufacturing and component seating are shed into the oil. Draining this "break-in" oil is essential to remove these abrasive particles.
- Subsequent Changes: After the initial change, aim for every six months of use or 50-100 hours, whichever comes first. If you use your generator frequently or in dusty/hot conditions, lean towards the lower hour interval.
- Recommended Oil: Honda typically recommends 10W-30 motor oil (rated API service category SJ or later) for general use in most climates. For very cold temperatures (below 0°F / -18°C), a 5W-30 might be more suitable. Always double-check your manual for the exact specifications and viscosity recommendations based on your local climate and anticipated operating temperatures.
- Procedure:
- Start the engine and let it run for a few minutes. Warm oil drains more easily and carries more contaminants. Then, shut off the engine and ensure it's cool enough to handle safely.
- Place the generator on a level surface.
- Remove the maintenance cover and the oil filler cap/dipstick.
- Position a suitable drain pan (capacity of at least 1-quart/1-liter) beneath the oil drain plug.
- Carefully tilt the generator to allow the old oil to drain completely from the filler hole.
- Once drained, return the generator to a level position.
- Refill with the recommended new oil, pouring slowly to avoid overfilling. Check the dipstick periodically; stop when the oil reaches the upper level mark. The EU2000i typically holds about 0.4 quarts (0.38 liters).
- Reinstall the oil cap/dipstick firmly and replace the maintenance cover.
- Properly dispose of the used oil at an authorized recycling center or automotive shop. Never pour it down a drain or onto the ground.
2. Air Filter: Keeping the Engine Breathing Easy
A clean air filter is essential for proper combustion. It prevents dirt, dust, and debris from entering the engine's combustion chamber, which can cause premature wear. A dirty, clogged filter restricts crucial airflow, leading to reduced performance, increased fuel consumption, spark plug fouling, and potentially severe engine damage over time.
Checking & Cleaning
- Check Before Each Use: Visually inspect the air filter. If it looks dusty, dirty, or clogged, it’s time for a clean.
- Clean Regularly: Clean the air filter after 50 hours of use or every 3 months, whichever comes first. More frequent cleaning is needed in dusty environments.
- Cleaning Method:
- Remove the air filter cover, typically held by clips or a single screw.
- Carefully remove the foam filter element.
- Wash the foam element in warm water with a mild detergent (such as dish soap). Gently agitate to remove dirt.
- Rinse thoroughly under running water until all soap residue is gone and the water runs clear.
- Squeeze out excess water gently. Do NOT twist or wring it out aggressively, as this can tear or damage the foam.
- Allow the filter to air dry completely. It must be dry before reinstallation.
- Once dry, apply a few drops of clean engine oil (the same type you use in the engine) to the filter. Gently squeeze the filter to distribute the oil evenly. This light oil coating helps trap even finer dust particles.
- Reinstall the oiled filter element and securely close the air filter cover.
- Replacement: If the air filter is torn, brittle, hardened, or significantly damaged in any way, replace it immediately. Always use an OEM (Original Equipment Manufacturer) Honda filter to ensure proper fit, sealing, and filtration efficiency. Aftermarket filters may not perform as well or fit correctly.
3. Spark Plug: The Heartbeat of Ignition
The spark plug delivers the electric spark that ignites the air-fuel mixture in the combustion chamber, making your generator run. A worn, dirty, or improperly gapped spark plug can cause a range of issues, including hard starting, misfires, rough idling, reduced power output, and increased fuel consumption.
- Adjust Regularly: Check and adjust the spark plug gap every 100 hours of use or after six months, whichever comes first. Consult your manual for the precise gap specification (typically around 0.6-0.7mm or 0.024-0.028 inches).
- Replace Annually: Plan to replace the spark plug fully once per year or after 200 hours of use, even if it appears to be functioning. This proactive replacement ensures consistent, reliable ignition performance.
- Replacement Part: Always replace with an OEM Honda spark plug. The recommended model for the EU2000i is typically NGK CR5HSB. Using an incorrect spark plug can adversely affect engine performance, damage the ignition system, or even cause engine issues.
- Procedure:
- Disconnect the spark plug cap by firmly pulling it straight off.
- Using a spark plug wrench (often included with your generator's tool kit), carefully remove the old spark plug by turning counter-clockwise.
- Inspect the old plug. Look for signs of wear (eroded electrode), carbon buildup (black and sooty), or oil fouling (black and oily). These can indicate other engine issues.
- Using a feeler gauge, precisely gap the new spark plug to the correct specification provided in your manual.
- Hand-thread the new spark plug into the cylinder head initially to avoid cross-threading the delicate aluminum threads.
- Once finger-tight, use the spark plug wrench to tighten it. Be careful not to overtighten; follow the torque specifications in your manual (usually about 1/2 to 3/4 turn after finger-tight for a new plug with a gasket). Overtightening can damage the cylinder head.
- Firmly reconnect the spark plug cap.
4. Spark Arrester: Preventing Wildfires
The spark arrester is a critical safety component located in the muffler. Its purpose is to prevent hot carbon particles from exiting the exhaust system and potentially starting a fire, especially when operating your generator in dry grassy areas, forests, or near flammable materials. A clogged spark arrester can restrict exhaust flow, leading to reduced engine power and overheating.
- Service Schedule: Service and clean the spark arrester after every 100 hours of use or every six months, whichever comes first. More frequent cleaning might be necessary if you notice reduced power or if the generator is used extensively.
- Cool Down is Key: Always allow the muffler to cool down completely (at least an hour) before servicing this part. The muffler gets extremely hot during operation.
- Maintenance Steps:
- Remove the Muffler Protector: You'll typically find a small access panel or a series of screws (often six) holding the muffler protector in place on the generator's side. Unscrew them and carefully remove the protector.
- Access the Spark Arrester: Once the protector is off, you'll see the muffler assembly. Locate the small 6mm bolts that hold the spark arrester screen in position (it might be a separate screen or integrated into a small pipe). Loosen and remove these bolts.
- Carefully Remove: Gently pull the spark arrester screen or assembly away from the muffler. It might be slightly carbon-bound, so a gentle wiggle might be needed.
- Clean Carbon Deposits: Use a stiff wire brush (a brass brush works well to avoid scratching softer metals) to thoroughly remove any carbon deposits from the screen of the spark arrester. Ensure the screen is clear and free of any blockages. You should be able to see through the mesh clearly.
- Inspect for Damage: While cleaning, meticulously inspect the part. If the spark arrester screen is significantly damaged, torn, corroded, or has holes larger than pinholes, it is crucial to replace the entire spark arrester rather than just cleaning it. A damaged arrester compromises safety. An OEM replacement will ensure continued safety and proper exhaust flow.
- Reassemble: Carefully reinsert the cleaned (or new) spark arrester, ensuring it's properly seated. Reattach and tighten the 6mm bolts, then re-secure the muffler protector panel. Ensure all bolts are snug but do not overtighten, as this can strip threads.
Fuel Management: The Unsung Hero of Generator Longevity
Beyond the obvious mechanical parts, the fuel you use and how you manage it plays a colossal role in your generator's health and readiness. Fuel-related issues are, hands down, the most common reason generators fail to start or run properly after storage.
- Fresh Fuel is Best: Always use fresh, high-quality unleaded gasoline. Gasoline has a surprisingly short shelf life—as little as 30 days without stabilization. Stale fuel degrades, oxidizes, and can turn into a varnish-like substance that gums up the carburetor, restricts fuel flow, and causes hard starting or no-starts.
- Avoid Ethanol (If Possible): Whenever possible, use non-ethanol gasoline. Ethanol in fuel attracts and absorbs water, leading to phase separation where water and ethanol separate from the gasoline. This water-ethanol mixture is highly corrosive to fuel system components (especially in older generators) and can cause catastrophic damage to the carburetor and fuel lines. Many stations offer ethanol-free premium gasoline.
- Fuel Stabilizer: For any fuel stored for more than a few weeks, especially during periods of infrequent use, always add a reputable fuel stabilizer (e.g., Sta-Bil, Sea Foam). Follow the product's instructions for mixing ratios. Stabilizer prevents fuel degradation, keeps your fuel system clean, and extends fuel's shelf life significantly (up to 1-2 years).
- For Long-Term Storage: If your generator will be stored for longer than a month or two, it is best practice to completely drain the fuel tank and carburetor.
- Add stabilizer to the fuel in the tank.
- Run the engine for about 10-15 minutes to circulate the stabilized fuel through the carburetor.
- Shut off the engine.
- Locate the carburetor drain screw (refer to your manual). Place a suitable container beneath it and open the screw to drain all fuel from the carburetor float bowl.
- Once the carburetor is drained, you can then drain the main fuel tank. Run the engine again until it completely stalls from lack of fuel. This ensures no fuel remains to cause problems. Neglecting this step is a leading cause of "won't start" issues after storage.
For more insights into optimizing your generator's performance and selecting the right fuel, you might want to Learn more about Honda EU2000i and its specific fuel requirements.
Beyond the Basics: General Care & Seasonal Readiness
Maintaining your EU2000i goes beyond just the engine's internals. A bit of general care can make a big difference in its appearance, function, and longevity.
- Keep it Clean: Wipe down the exterior of your generator after use, especially if it's dusty or dirty. This prevents grime buildup, corrosion, and allows for easier visual inspection of components for any leaks or damage. A damp cloth is usually sufficient. Avoid spraying water directly into electrical components.
- Regular Inspections: Beyond the scheduled maintenance, get in the habit of a quick visual inspection every time you use or store your generator. Check for loose bolts, frayed wires, damaged fuel lines, or any unusual wear.
- Proper Storage Environment: Always store your generator in a clean, dry, well-ventilated area, away from direct sunlight, extreme temperatures (hot or cold), and corrosive materials like fertilizers or pool chemicals. Ensure it's stored on a level surface.
- Run It Regularly: Even if you don't need power, it's a good practice to start your generator every 1-3 months and let it run for 15-20 minutes under a light load (e.g., a couple of light bulbs or a small fan). This circulates oil, keeps seals lubricated, ensures the carburetor doesn't get gummed up, and helps you confirm it's ready when truly needed. This short run also burns off any old fuel that might be in the carburetor bowl.
Winterizing Your EU2000i for Off-Season Storage
If you live in a cold climate and won't be using your generator for several months, winterizing it is crucial:
- Fuel System: Follow the long-term fuel storage steps mentioned above: stabilize fuel, run to circulate, then drain tank and carburetor completely. This is the most important step.
- Oil Change: Perform an oil change so that the engine is stored with fresh, clean oil.
- Spark Plug: Remove the spark plug. Pour approximately one teaspoon of clean engine oil into the cylinder through the spark plug hole. Gently pull the recoil starter a few times (without the spark plug installed!) to distribute the oil and coat the cylinder walls. This prevents rust during storage. Reinstall the spark plug.
- Cleanliness: Clean the exterior thoroughly.
- Cover: Cover the generator with a breathable cover to protect it from dust and moisture. Do not use non-breathable plastic that can trap condensation.
- Storage Location: Store in a dry, stable temperature environment if possible.
Common EU2000i Maintenance Questions & Pitfalls
"My generator won't start after sitting for a while. What's wrong?"
The overwhelming majority of "no-start after storage" issues are caused by stale fuel that has degraded and clogged the tiny passages in the carburetor. If you didn't drain the fuel or use a stabilizer before storage, old gasoline turns to varnish. This often requires professional carburetor cleaning or rebuilding.
"Can I use car oil in my EU2000i?"
Yes, generally, you can use standard automotive engine oil, provided it meets the viscosity (e.g., 10W-30) and API service classification (e.g., SJ, SL, SM, SN or later) recommended in your Honda manual. Small engine-specific oils sometimes contain additives beneficial for air-cooled engines, but a high-quality automotive oil meeting specifications is usually fine. Always verify against your manual.
"How often should I replace the fuel filter?"
The Honda EU2000i does not have a user-serviceable inline fuel filter in the same way some larger generators or vehicles do. It relies on a screen filter inside the fuel tank and fine mesh filters within the carburetor. Therefore, keeping your fuel impeccably clean and fresh is the best "fuel filter" maintenance for this model. If fuel delivery problems persist despite using fresh fuel, the carburetor itself may need cleaning or rebuilding, indicating issues with internal filters or jets.
"Is it okay to run my EU2000i at maximum load all the time?"
While designed to handle its rated output, continuously running any generator at its absolute maximum sustained load can put extra stress on the engine, increase wear, and may reduce its overall lifespan. It's generally better to size your generator so it runs comfortably at 50-75% of its continuous rated load for extended periods. This allows for efficiency and a buffer.
"What if I lose my owner's manual?"
Don't panic! Honda provides digital versions of all their owner's manuals online, typically in PDF format. A quick search on the Honda Power Equipment website for "EU2000i owner's manual" will quickly yield the exact document you need. It’s an invaluable resource for specific torque values, part numbers, and detailed diagrams for every maintenance step.
Your EU2000i: A Partner for Years to Come
The Honda EU2000i is a premium piece of equipment, celebrated for its legendary reliability and built to perform and last. But its remarkable longevity isn't solely dependent on Honda's engineering prowess; it relies heavily on your proactive commitment to its care. By consistently following these maintenance tips—from regular oil changes and spark plug replacements to diligent fuel management and proper storage—you're not just performing routine chores. You're making a tangible investment in reliable power, securing your peace of mind, and ensuring that your generator is always ready to answer the call, whether for recreation or emergency. Treat it well, and your EU2000i will be a faithful, quiet, and efficient partner for countless years to come, powering your adventures and protecting your comfort.